Showing posts with label Furniture. Show all posts

Wednesday, October 6, 2010


During my last post, you were introduced to my beautiful new chairs. This post, I'll show you the progress I've made so far.
Prep work: Chair 1
My first chair actually needed fairly little work. It was solid, fairly smooth, and hardly creaky at all.
 However, as you can see the seat caining had busted right through. So my first step was to take a pliers and rip that seat right out of there.
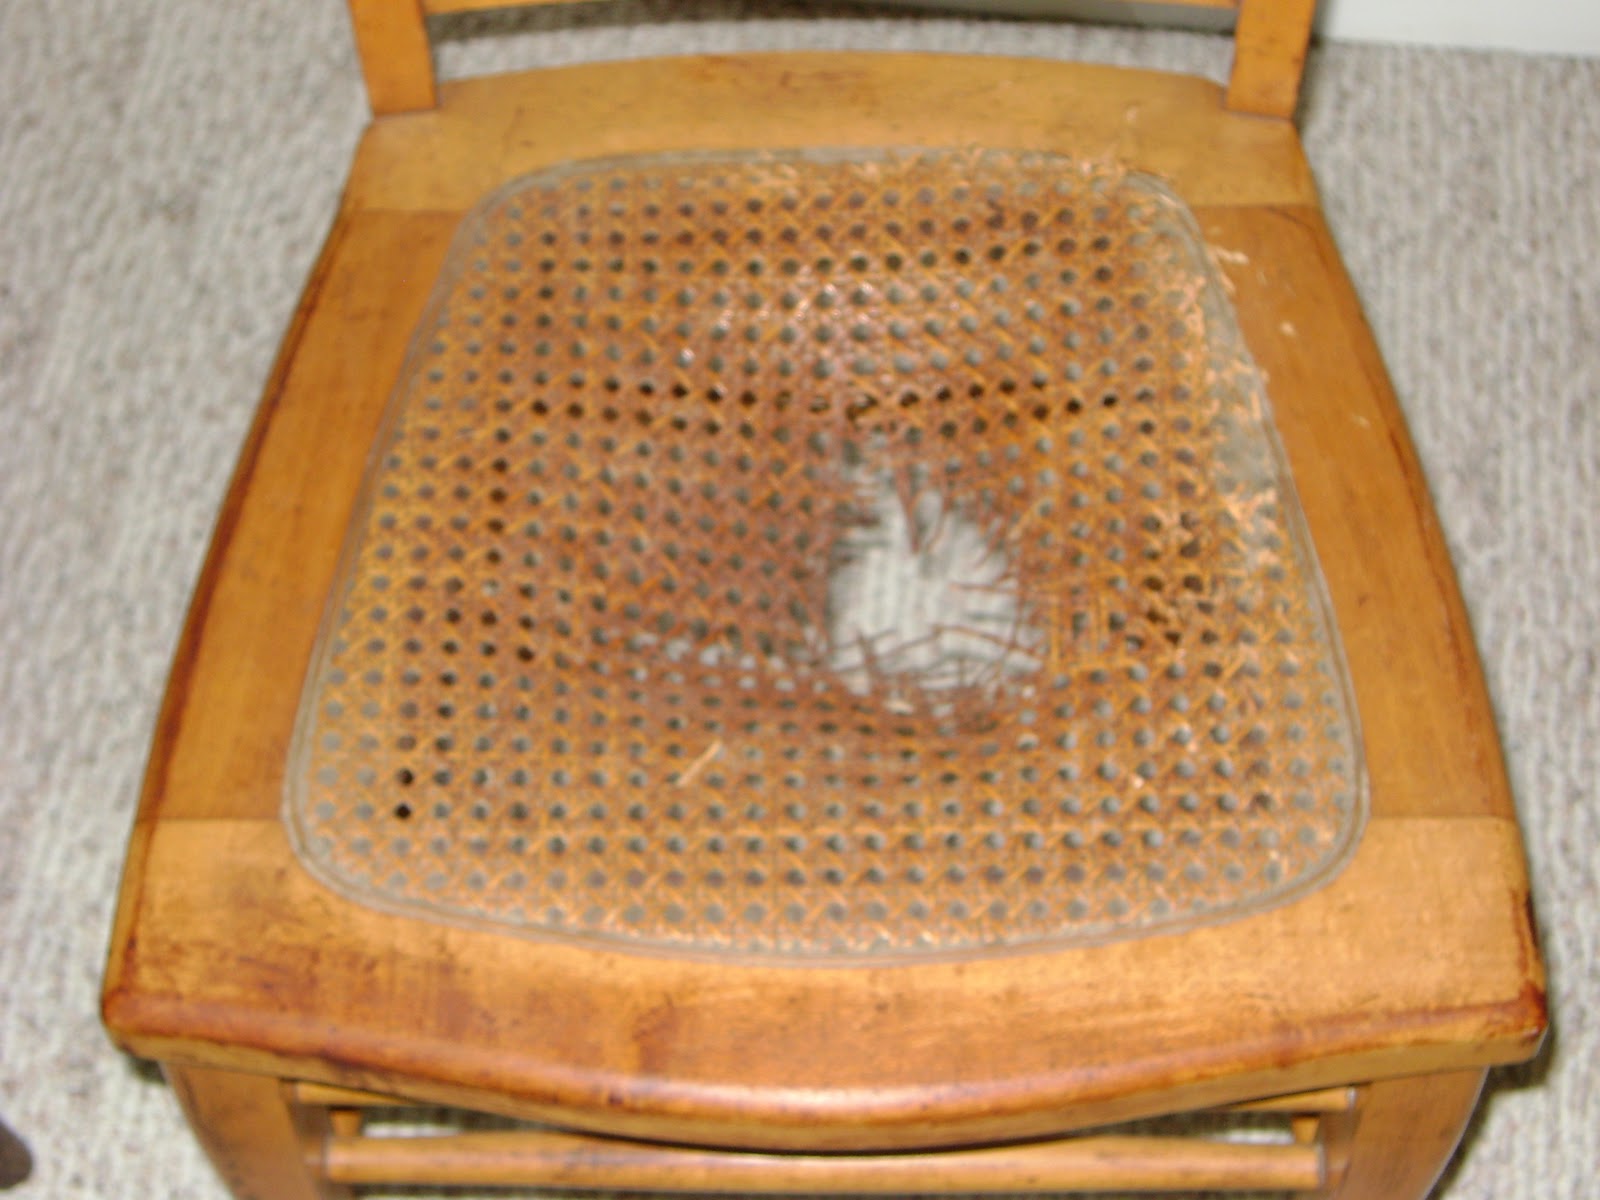
 Now, I know ripping isn't exactly the best way to get rid of these, but we're a little short on tools around our basement, so I use what I have :) That left me with a bunch of ragged edges around the seat though, which I then tackled with whatever sandpaper we had around.
 
The rest of the work, I did in Howell. For this chair, it involved just sanding off the finish with an electric sander.

Prep Work: Chair 2
The next chair, on the other hand, needed more than just a little work. It was creaky, cracked, and to be honest, I was a little afraid it might collapse any minute. We took it to Howell, where I could get help from a pro--Jared's dad, Jeff. 
We began with the most basic issue--fixing the structure. This involved adding screws, replacing screws, gluing, and regluing rungs. This was fun, because for me it was a major learning experience. One of the most valuable things I learned to do was to reglue the loose rungs. And it was easy--we pounded them out with a rubber mallet, reglued it with some Gorilla Glue, and then clamped the chair together and moved on.
Fixed rungs
With that fixed, the chair actually became pretty stable. All it took then were a couple new screws, and it was all set. Mostly. I was still pretty concerned by this cracked seat corner. Not only was it a gaping crack, but it was also kind of unstable.  
 So we used some wood glue and clamped it together, and then I filled the crack with some Plastic Wood. This is what it looked like after.
Once this chair gets a new coat of paint, it'll look like nothing was wrong to begin with.

Seats:
Now, just looking at these chairs, it's pretty easy to see what's wrong with them:
No seats!  So the next obvious step is to make them some seats. For this, I had a couple options, some complicated, some not so much. But what I wanted (and still want) is a seat that is solid, snug, and can be removed easily, with hopes that the final product will be a cushioned seat that I can lift off and change fabrics at a whim for a new look. Jeff came up with the design we ended up using--a fiberboard seat that extends to within an inch of the edge of the frame. This seat is attached to a wood insert that fits into the frame hole, preventing the seat from sliding and adding weight to keep it tight. 
I made a basic pattern for the seats using poster board, traced it onto the fiberboard, and then faced my greatest fear: the band saw. Ok, so it's not my greatest fear. It's just that everytime I think about an electric saw, I get images of severed fingers and hear echoes of those woodshop horror stories teachers like to tell students to scare them. But it ended up actually being pretty fun. 
So brave... :)
At the end of the weekend, this is what we ended up with:

Freshly glued, sanded, ready for painting, and now, including seats! The next step will be painting, and  adding foam padding to the seats to make a basic cushion. Thanks for reading!


Monday, September 20, 2010


Good morning all!
Jared and I love the look of antique furniture. A couple weeks ago, we heard of a monthly antique fair in Allegan, Michigan from my older sister, and decided to give it a shot. While we were there, we quickly learned that dragging yourself out of bed a couple hours early to get there when it's cool is definitely worth it! The fair was really neat, with lots of vendors and treasures, but it was so hot! But it was worth it too. Our original goal was to find some cool wooden chairs like these:

My goals is to collect 4 chairs like these, paint them a unifying color and add some cushions. Unfortunately, finding chairs that actually work has proved...well...impossible so far! That'll hopefully be a later project. But anyway, instead of finding chairs, we found these--

We thought they would work great as night stands, but they needed a little work, so took them with us to Jared's parents' house, and spent a wonderful afternoon in the garage working with our hands. First, we took off the drawer pulls that had been glooped up with paint. We were planning on just buying new ones, but I liked the antique look of these and thought it'd be fun to find out what's underneath all that paint first. We threw those in a bucket of paint thinner, and waited an hour. The results were amazing! Almost all the paint came off, and what didn't could be scraped off with some steel wool. After that, Jared's mom was  a trooper and spent an hour and a half buffing and polishing them to a shine with a dremel tool. They came out looking amazing, perfectly aged and worn, so we decided to use them. But we added a coat or two of lacquer to keep the shine and prevent discoloration.

After that, our top priority was to fill in some of those gouges on the tops. We like a few texturizing bumps and scratches, but these tops were beyond everyday wear and tear--it looked like someone had taken a hammer to them! With the help of Jared's dad, we filled in the gouges with Bondo. It took a couple times of filling, drying and sanding before it came out how we wanted it, but it made all the difference.

Our next step was the biggie--painting! We decided on black, since we are getting a wrought iron bed and thought this would accent it nicely. We had opted against stripping the paint from the actual stands, and since we were then painting over an already painted surface, we decided to use paint brushes to get some brush strokes. This helps create the illusion of wood grain. After it dried, we grabbed our sand paper and sanded down the edges to create that worn look. Here, we ran into a couple problems. Some areas didn't seem quite dry, even though they should have been, and the paint peeled instead of sanding away. In other areas, we were simply sanding down to that white paint underneath instead of the wood, creating too much contrast. In the end, I discovered that sanding the areas with only wood underneath worked, and with a lot of patience and finesse, we finally got the look we wanted. Then, Jared smudged on some watered down, dark brown acryllic paint over the whole piece. This gave it more texture, more of a wood look, and warmed up the black paint a bit. Plus, it helped cover up the areas where there was still too much contrast. In the end, these were our final products.

What do you think? Right now, we're using them as side tables in our "living room" area. We're excited for when we actually get to use them as night stands!